|
I've figured out
what detail I think I can get away with. It's hard to describe
and I may have to fudge later, so we just get to see how it all turns
out. :)
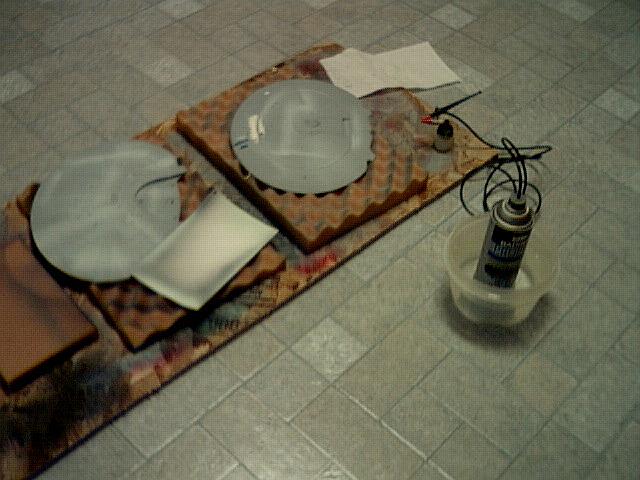
Today I spent four
hours on the back wall of the shuttle bay. I tried to make it
look like a door that lifts upwards in multiple stages. It was
some pretty serious airbrushing.
|
 I started by learning how to make little, tiny lines with an airbrush.
The hull of the ship will be striped using a method very similar to
what I messed with (air brushing against a card, then moving the card
back step by step), but that didn't leave a clean enough line in a
space about 1/4" thick.
I started by learning how to make little, tiny lines with an airbrush.
The hull of the ship will be striped using a method very similar to
what I messed with (air brushing against a card, then moving the card
back step by step), but that didn't leave a clean enough line in a
space about 1/4" thick.
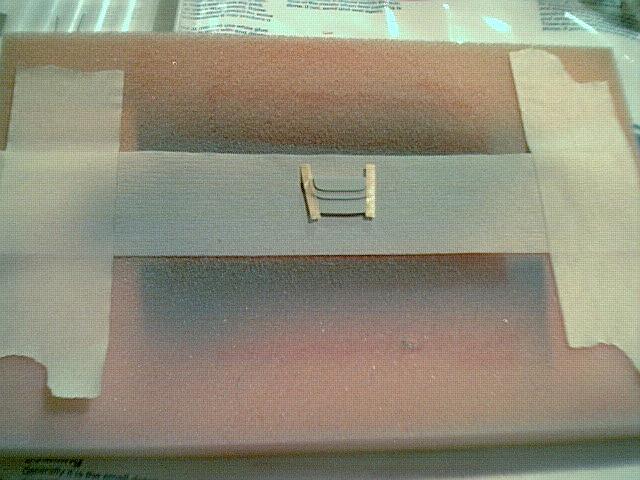
I purchased some 1/8" mask from a local art store -
thought I'd use that instead. I played with the idea on the hull
of the Enterprise-D, then went to work on the actual piece.
|
|
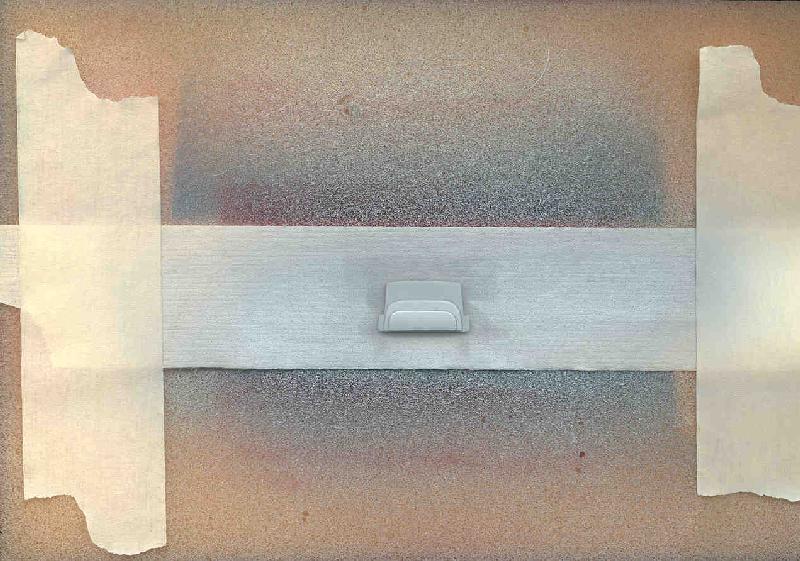
 Masking the tiny piece was easy enough, just really tedious. The
painting was done by moving the piece to the kitchen, swiping it with
the airbrush, then moving back to the table and adjusting a strip of
masking (the paint dries almost instantly when there's so little),
then going back to the kitchen, then back to the table to adjust the
masking another 1/16", etcetera.
Masking the tiny piece was easy enough, just really tedious. The
painting was done by moving the piece to the kitchen, swiping it with
the airbrush, then moving back to the table and adjusting a strip of
masking (the paint dries almost instantly when there's so little),
then going back to the kitchen, then back to the table to adjust the
masking another 1/16", etcetera. When all
was said and done, I then applied a coating of flat finish. |