|
I got to the store about
45 minutes before they were going to close - they were pretty busy, but they
took the time to point me in the direction I needed to go. I found an
Enterprise-D model with a fibre-optic lighting kit - I thought this would be
perfect as I'd have something resembling a starship to work on, and I could use
the included lighting kit to get a clue on how models are lit, and I could cannibalize
the parts for the Voyager as it's an unlit kit.
I found a Testor's
beginners airbrush, wasn't too expensive. Came with starting paint, air
and everything, as well as an instructional video on how to airbrush - looked
perfect. I also found a modeler's materials kit which has sanding fabric
(sand paper on a fabric base), glue tips, paint / glue brushes of varying sizes
and a dropcloth. Picked up some thinner for the airbrush paints, too, and
a fabulous book by ModelMaster, the "Modeler's Technical Guide".
It has incredible amounts of information both novice and advanced, including
tips on how to do things with decals, airbrushing, paint mixing, etcetera.
It also has a paint equivalence table in the back so you can line up different
brands of paint to the same color. It is, at this point, my primary
reference.
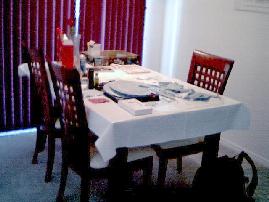
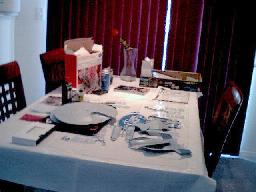
 Got home, put together my table and learned
about airbrushing. I thought the air pushed through the same hose the
paint was in, kinda like a blowgun, when in fact the air just rushes over the
tip connected to the reservoir, and the force of the moving air pulls the paint
out, which then gets atomized and blown in the direction of the air
current. Pretty cool.
Also learned that the
airbrush kit I got (Testor's Model Car Airbrushing Set, including airbrush model
A270) comes with Acrylic paint, which water can thin and clean.
Read through the book,
watched the video. Opened the Enterprise-D, sorted out all the
parts. Observed that the fibre optic components, while simple, would be
extremely useful. I'm not confident in using lamps, though - I'd rather
use LED's, as I never, ever want to have to cut my completed ship apart
just to replace a burned out bulb. On the other hand, I have an
Enterprise-D toy by Playmates which obviously has bulbs in it, and I have been playing with it for years and it's survived so far...
 I've been considering the lighting scheme
I'll use, the wiring - I think if I put a capacitor of appropriate size across
the power leads I'll be able to use it to absorb any surges (turning the lights
on, for example), and extend the life of bulbs. I may do that with LED's
anyway, I'm not sure.
Contemplating the windows,
and lighting them. The Enterprise-D kit came with a battery powered
microdrill (damn handy tool, that) for the windows. That ship's windows
are so f*cking small that two micro holes are the size of a whole window; it
would be very difficult to paint a window gloss white with a needle, they're so
small! It's no wonder they think a tiny optical fibre would suffice, you
don't have enough space to make a decent window of it.
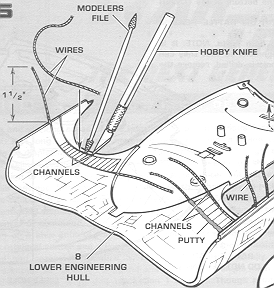
Also (speaking of problems
with that model), they expect the builder to cut a groove up the rear of the
body to run the wire to the nacelles, then put putty over the groove and sand
it! I think this is positively disgusting - it can't possibly make for a
perfect surface. I've reviewed many completed Enterprise-D models on the
'Net, and you can see where those wires are on every one of them.

Even if your putty / sanding job is
perfect, great coats of paint and everything else is right and you succeed in
hiding those lines, you still have the issue of putting the nacelles in place,
which is very tight and cumbersome with those wires. I think that the body
should be multi-layered, so that there is a space for the wires (it is, after
all, a lit model - Ertyl (the manufacturer) should have expected this). I
don't think this is unreasonable, as that's exactly how the Playmates toy is
done.
Anyway, I'm learning that the plastic (at least
on this model) requires a lot of "massaging". I wonder how much
the Voyager model will take.
|
|

