07/16/01
|
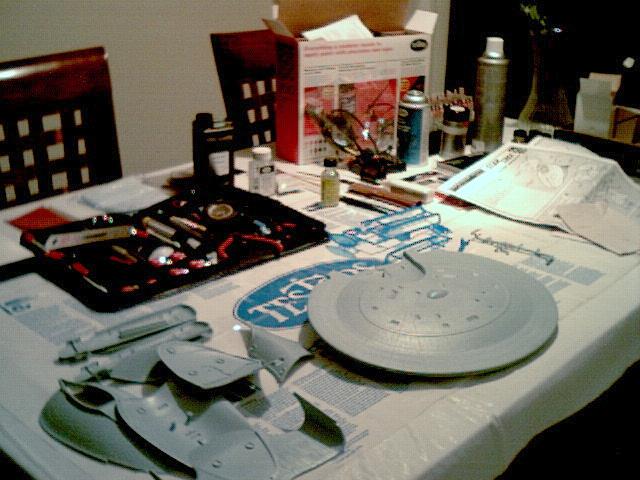
I got the money to the seller of the voyager kit post-auction - he's sending it from Canada, it's due to arrive Friday or Monday. I went to the local Radioshack.Com store after work and examined the LED's they had available. They have a 'white' LED, but the output is much more blue. If you look at it, you could get away with calling it white, but if you shine it on something white, it's definitely blue. I'm thinking to get a true white output I'll need to use miniature lamps. I'm not inclined to use florescent lamps because they have a refresh rate - you can tell it's florescent (this is why they're a bad idea in shops, because with machines like a lathe it's possible for the rotation frequency to match the light's flashing frequency and look like it's not moving). I'm definitely leaning towards using a slightly undervolted power supply and a capacitor to absorb any surges, so I can have nice white window lights. I bought some thin solid core wire, and some shrink tubing. The instructions say to keep the fibre strands together with scotch tape, but that seems like a long term disaster. I intend to bundle them into shrink tubing. I also examined different color mini LED's, because I don't think the kit accommodates for running lights at all (port / starboard, white light over designation, etc). Went to the hobby store and got the paints I had read about on the 'Net. Found a great site that demonstrated a great painting method (http://thomasmodels.com/voybu.html) and the recommended colors to use (http://www.starshipmodeler.com/trek/voycolor.htm). Found that the colors they referenced are in enamels, and not acrylics. Discovered that acrylics are watercolors and enamels are oils (I know that's considered basic, but remember that's what I'm learning.. :) ). In general I would lean towards painting anything with oil-based paint, but what cinched it is the fact that everyone who references the colors (including the creator of the prototype Voyager) references the enamel color scheme, so that's good enough for me - I'm not up to winging color equivalences, and I don't mind using thinners. The fellow at the hobby store pointed out that a base coat should be applied extremely thin - the purpose is simply to give your real paint something to hold on to, doesn't need to be anything fancy. I also learned from the ModelMaster's book that the parts should be perfectly clean prior to assembly and especially painting, and that you should wear latex gloves while handling to ensure your finger oils don't get on the pieces as it causes imperfections in the paint job. Came home and started putting together the saucer section of the Enterprise-D. I found that if you use a drop of ModelMaster's "Liquid Cement for Plastic Models" to anchor a totally loose piece, you'll have time to fidget with it and make it perfect, and it will allow you to use less holding pressure while you apply the real adhesive ("Tenax7R Plastic Welder", as recommended by the fellow at the hobby store - melts the plastic and fuses the pieces together). I learned that capillarity is something you totally want to encourage when working with this stuff - a half drop goes a very long way. Also, the plastic stays soft even after the bond is complete, so if you need to do further filing for whatever reason you need to wait. Speaking of filing, very small files are a must. I played with the microdrill, and discovered that the bit gets hot enough to melt the plastic very, very quickly - you can't just start drillin' away as 1) melted plastic on the tiny bit is very hard to clean off without bending the bit, and 2) the melted plastic makes the hole bigger than it should be. Also learned that the pieces supplied in the model don't fit exactly where they should (obviously, now), but this forces you to make one of three critical decisions in part placement - change the part and use it, place it and make up for it with putty, or don't use that part and adapt the model accordingly.
|