|
 I've cleaned up the table, posted a copy of the instruction sheet on
the wall and have begun working on the Voyager. I've been
spending the last couple of days writing down the exact steps I'm
going to follow in its construction - lighting the thing has
radically changed how the instructions lay out the construction
process and have added a plethora of new considerations (checking
for light leakage, what on the inside should be painted what and
when, what fibres should be masked and which should be left to
absorb light, etcetera).
I've cleaned up the table, posted a copy of the instruction sheet on
the wall and have begun working on the Voyager. I've been
spending the last couple of days writing down the exact steps I'm
going to follow in its construction - lighting the thing has
radically changed how the instructions lay out the construction
process and have added a plethora of new considerations (checking
for light leakage, what on the inside should be painted what and
when, what fibres should be masked and which should be left to
absorb light, etcetera).
|
| I'm finding that Elton John is good to
work to, though it takes a modicum of restraint to sit in one spot
filing something rather than dance. :) Starting on the saucer section, I've
removed the parts that I need from the sprue and have begun cleaning
them up and fitting them. It's taken an hour so far to clean
up five of the upper windows..
|
|
(10 hours later)
 Wow, am I tired.. I've gone as far as the manual would have me go
before I start improvising, though there are a couple caveats I ran
into that make me so very happy that I had some practice first!
Wow, am I tired.. I've gone as far as the manual would have me go
before I start improvising, though there are a couple caveats I ran
into that make me so very happy that I had some practice first!
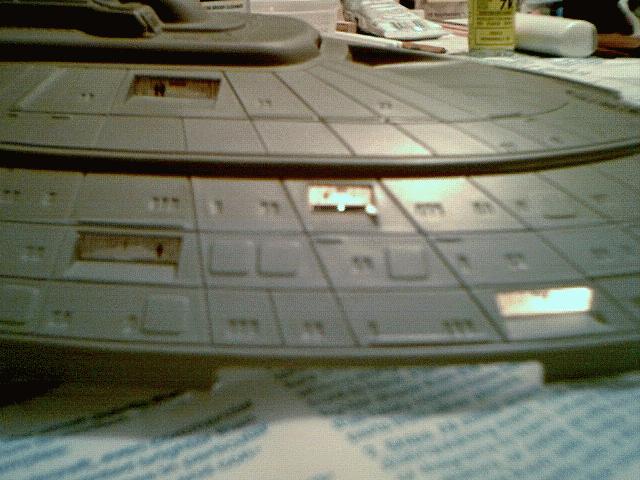
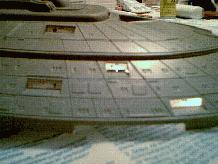
I installed the fore and upper sensor
arrays, auxiliary deflector dish base and all the windows. The
windows were pretty complicated in that cementing them in place was
a two step process - one to tack them in place and wait two hours
for the tacks to dry, then going back over them to ensure they
wouldn't go anywhere (important, because I'll be masking and
unmasking them with caulk later).
|
 Putting the window decals on was horrible, though admittedly due to
my desire for perfection. I'm pleased I had some experience in
application of decals first or I'd've been SOL. The
instructions tell you to make some glue with white Elmers and water,
but I chose not to do this because I knew it would fog up the
windows, if only a little. So, I soaked the decals longer than
recommended to eliminate the glue that was on the wrong side, then
used the dental picks to place and orient the decal on the window
the way I wanted it. After the water was evaporated I used
decal solvent to actually affix it to the plastic (two coats).
Putting the window decals on was horrible, though admittedly due to
my desire for perfection. I'm pleased I had some experience in
application of decals first or I'd've been SOL. The
instructions tell you to make some glue with white Elmers and water,
but I chose not to do this because I knew it would fog up the
windows, if only a little. So, I soaked the decals longer than
recommended to eliminate the glue that was on the wrong side, then
used the dental picks to place and orient the decal on the window
the way I wanted it. After the water was evaporated I used
decal solvent to actually affix it to the plastic (two coats).
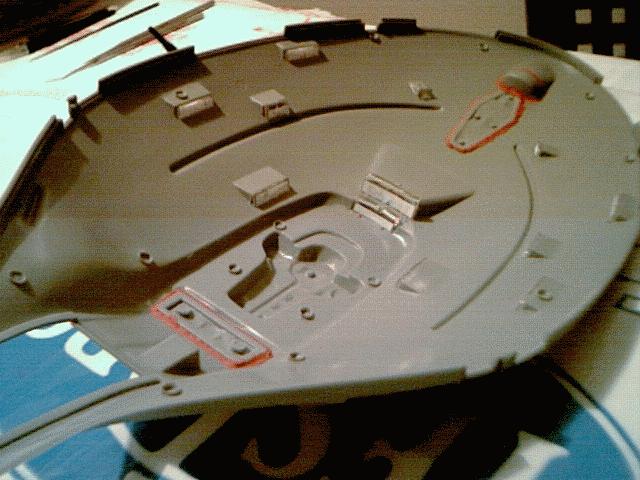
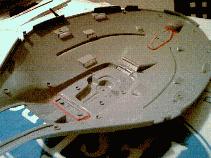
I put in the niches where the forward
hull lighting fibre will go - I'm pleased, I think this will work
well.
|
| This is where I left off for the
evening. Next steps are to install the large fibres (running
lights, forward hull light), LEDs and their wiring, paint the
windows, drill the micro-holes, place the fibres.

|
|
|