

The first thing you need is a firewall, and it should be separate from your Comcast or CenturyLink bridge. Vendors don’t make distinguishing these things easy because they want you to believe that their device has every element you need – “modem and firewall, all in one!” – but sometimes they do and sometimes they don’t.
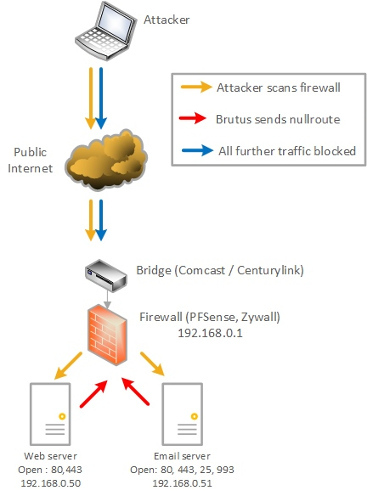
In this reference diagram we see the bridge is separate from the firewall, optimally a separate piece of hardware. It’s entirely possible that if you buy your own “cable modem” or DSL router that it really is all-in-one. If you can SSH into the device from your desktop AND send routing commands to it, it’ll probably work fine.
It’s optimally separate because Comcast controls the firmware of every device connected to the coaxial cable. Even if you buy it yourself from Best Buy, the only reason Comcast lets it work is because they have an agreement with the vendor to modify and upload their firmware as soon as you connect it to your account. If they can’t control the firmware, it won’t work. Ergo, if you buy an expensive, powerful and awesome device and it still isn’t working, it’s because they don’t have an agreement with Comcast to provide what they need to flash its firmware.
If the cable provider can flash your network device and control the firmware, then your firewall is only as effective as they allow it to be. Comcast has been caught scanning internal networks before, and with the death of Net Neutrality you can bet they won’t stop scanning inside our home networks out of the goodness of their little black hearts.
PFSense is a fantastic open source firewall that you can load on that old laptop in the closet / desktop you haven’t sold on EBay yet. If you don’t have enough network adapters (say, in the laptop) you can get any USB to Ethernet adapter and get additional ports that way. OpenSense is a fork of PFSense, so should PFSense ever go pay-only you can use OpenSense instead. Should you desire a hardware appliance, Zywall small business firewalls work beautifully as well. In the end, any firewall you can SSH to and insert route commands via command line will work. Sorry – how to configure home firewalls in general is out of the scope of the Brutus article series, that may show up as it’s own article someday. Use what follows as reference after it’s all set up.
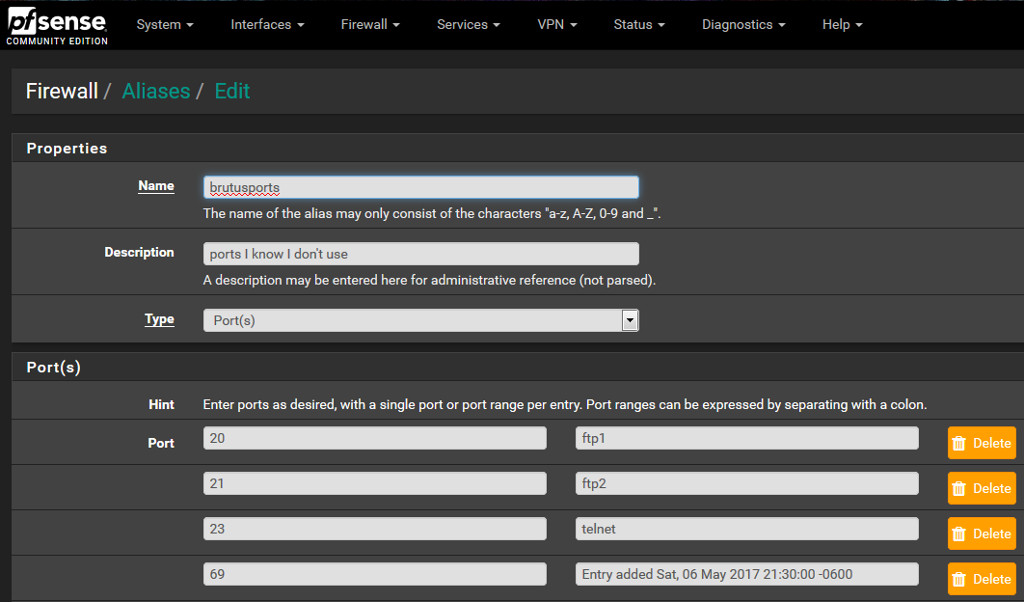
First, create an alias list of ports that you never use. Nobody should be hitting your network with 10000 (XWindows), 3389 (RDP – if you allow this you shouldn’t be!) and 137:139/445 (Windows shares). Below is a URL of common ports – populate this list with all ports you’ll never use but are common.
http://mobinnet.ir/uploaded/common_ports.pdf
https://www.webopedia.com/quick_ref/portnumbers.asp
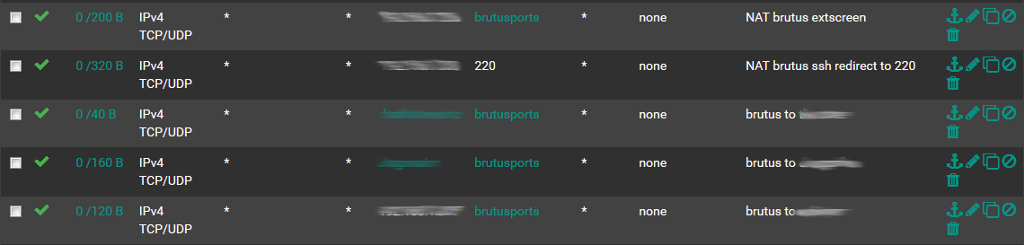
You then need to insert WAN rules to allow external access to the Brutus server and clients. These come before the actual ports, also allowed – ie, first you allow everyone to hit the “honeypot” ports that will result in their getting blocked, and down the list you put in the actual TCP 80/443/etc rules that allow service.
Portsentry running on the Brutus server and clients will intercept these port “touches” and run Brutus as a result.
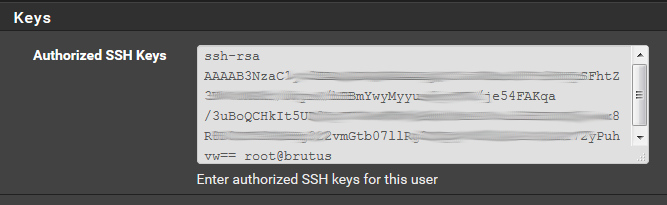
Lastly, after setting up the Brutus server, you’ll need to put the root user’s public key in the PFSense admin account. Go to Users – edit the Admin user and put the ssh public key in the dialog box toward the bottom. This will allow the root user on the Brutus server to issue commands to the firewall (Portsentry has to run as root).