


Calibration of a 3D printer can be a major pain in the ass. These devices can consistently lay down molten plastic with 0.01mm tolerances… or they can make a rat’s nest. There is a fantastic amount of information available on the ‘net and you’ll need to do your own research for the printer you have, but I’m sharing details of my own research and discoveries in the hope it’ll provide a gem or two that you can use with just a little less blood, sweat and tears than it cost me!
I have an Tenlog IDEX TL-D3 Pro that can print in all plastic mediums including PLA, ABS, rubber, etcetera. Calibrating a single nozzle is PITA enough, and I set myself up to calibrate two. My printer is thrilling when everything works perfectly, but it can take a dedicated day and a lot of coffee to get there.
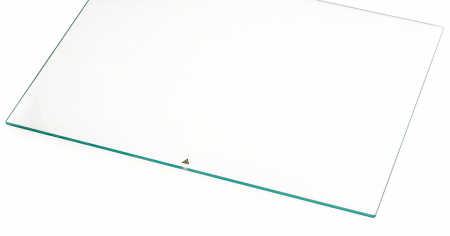
Step 1 – A Good Bed
I’ve learned that you can do All The Things, but if your print bed has dips, divots and malformations, the rest will never matter.
- I’ve come to prefer glass, as it has deviations measured in thousandths of an inch whereas tape, flexible materials and others can develop divots over time, succumb to heat warpage, get damaged with use, etc. For the most part, glass is either good or in pieces.
- You need borosilicate or tempered glass if you have a heated bed, and especially if you’re printing ABS.
- Mirrors are optimal because you can see every little speck of dirt or any deviations in the surface. Borosilicate / tempered mirrors, however, are hard to find.
- The glass that came with my printer was textured with little divots/micro-holes in the surface, which I was sure would help with adhesion – it didn’t, and was nothing but a PITA over time. A flat glass surface is all you need and is, to me, optimal.
Step 2 – A Clean Bed
It has to be clean, and it has to be cleaned correctly.
- Never touch the glass with your oily fingertips – use tweezers, a putty knife or whatever works, but not your fingers.
- Glass will show any dust, debris, oil smudges, etc pretty clearly. Textured or coated beds change over time and in different places making confirmation of a clean bed just that much harder.
- Rubbing alcohol should work perfectly… but it doesn’t. It will leave something behind on the bed that can take upwards of an hour to evaporate off, even when it looks like it’s all gone. Super frustrating!
- Ammonia’s not bad, but damn it sure does stink.
- Therefore : Just use liberal amounts of Windex, or unclip the bed and carefully use soap and warm water. Best thing for it. Since unclipping the bed requires recalibrating the whole bloody thing again however, that leaves Windex for the daily job.
- Use a lint free cloth to wipe it.
Step 3 – A Clean Nozzle
If your print nozzle is clogged or dirty, you’ll unable to level the bed because the signs you’re looking for will be inconsistent. Squish? Stick? Consistency? Who knows when the material can’t extrude right in the first place.
You should be able to extrude filament in a clean, straight, consistent line. If you can’t, run some cleaning filament through or empty the extruder and run a large acupuncture needle through it in the opposite direction and re-load the nozzle until it feeds properly. “Cold pulls” may help remove large debris, you’ll need to research how best to do that on your own printer. You may need to do much more research on this topic depending on the state of your nozzle.
Some filament is dirtier than others – carbon fiber filament leaves little bits and is sensitive to being left in the nozzle at printing temperature, for example. It’ll also act like sandpaper to brass nozzles – first thing I did is replace my nozzles with steel.
Step 4 – Warm everything up!
Heat up your bed to printing temperature and your nozzles to 150 degrees celcius, then let it sit there for a half hour. This is because all things flex with heat so if you calibrate your bed cold, the result is perfectly useless when it’s hot and ready for use.
150 degrees is under the melting temperature of PLA so your nozzle(s) won’t be leaking while you’re calibrating, yet warm enough to get the job done.
The following assumes you are doing the rest by hand. If you have an auto-calibrating bed then use it!
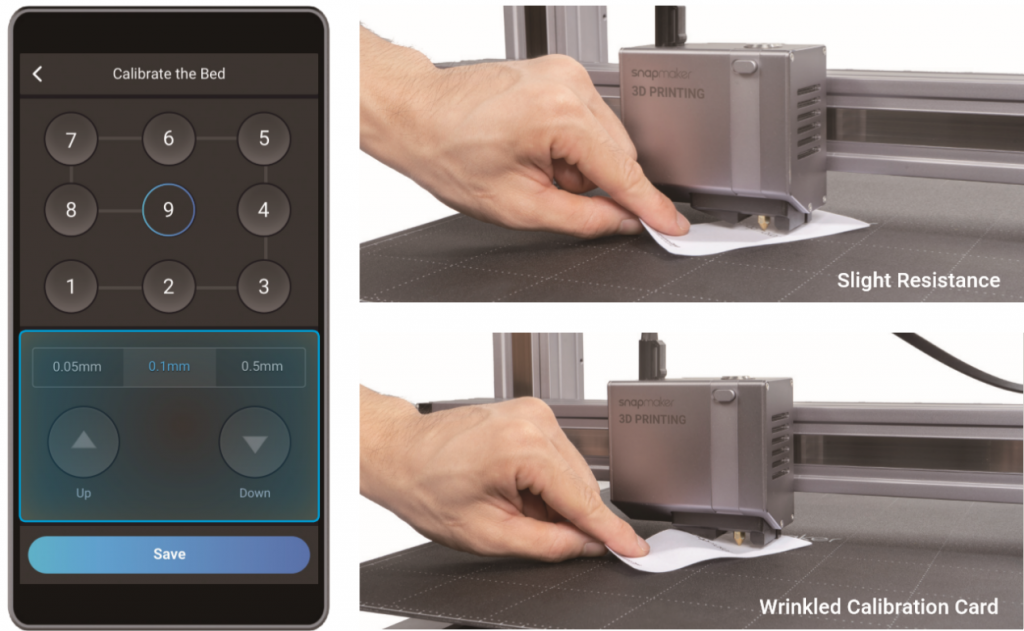
Step 5 – Calibrate each corner using the paper method
I’ve tried everything from 0.08″ spring steel gap testers to radial dials calibrated to 0.001mm, and was super frustrated to find nothing works better than paper.
It’s best not to move your print head / extruder by hand across the bed, as not only can it scratch the glass but it messes with accuracy. Up/down movements are better for the glass bed then left/right.
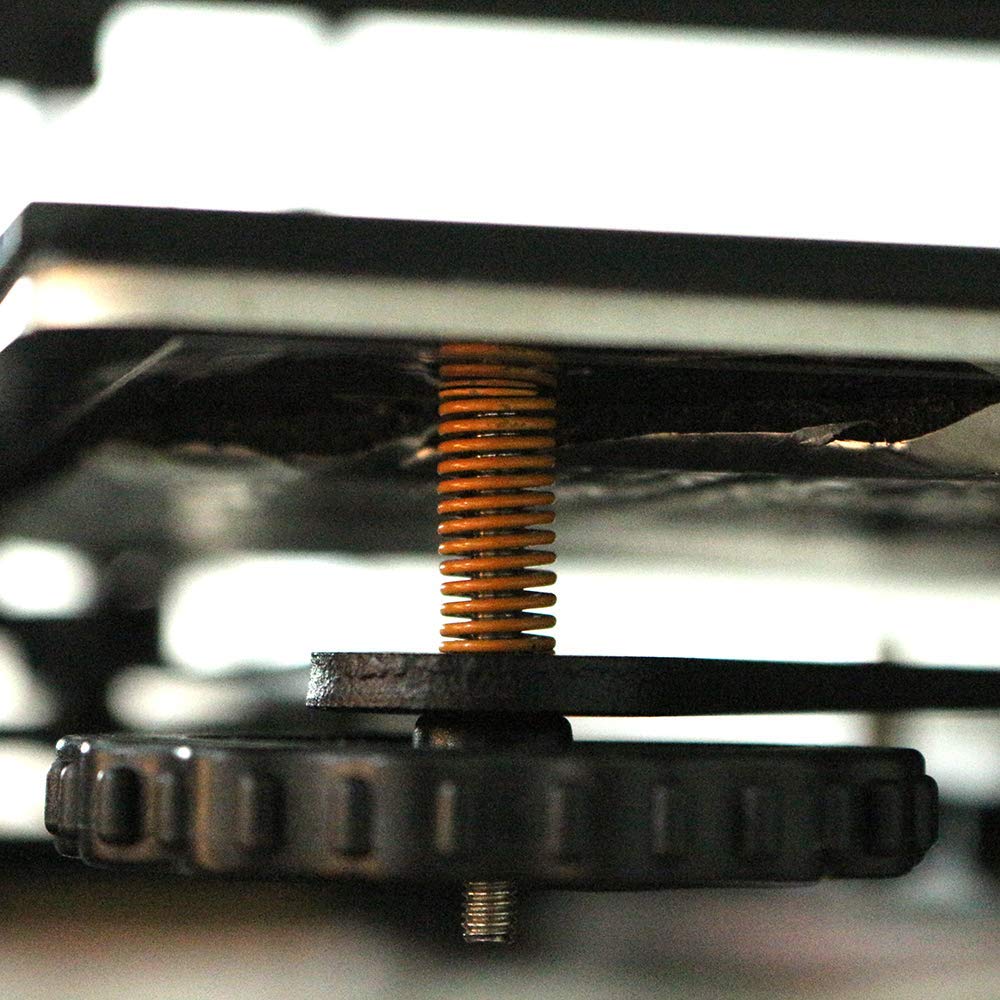
The glass print bed sits atop a heated aluminum surface, which is installed on springs and tightening knobs – you can push the brass, steel or even ruby-tipped print head into the glass and not scratch it because these springs will take the pressure, but if you move the extruder left/right by hand under pressure you could leave a massive gash in your glass!

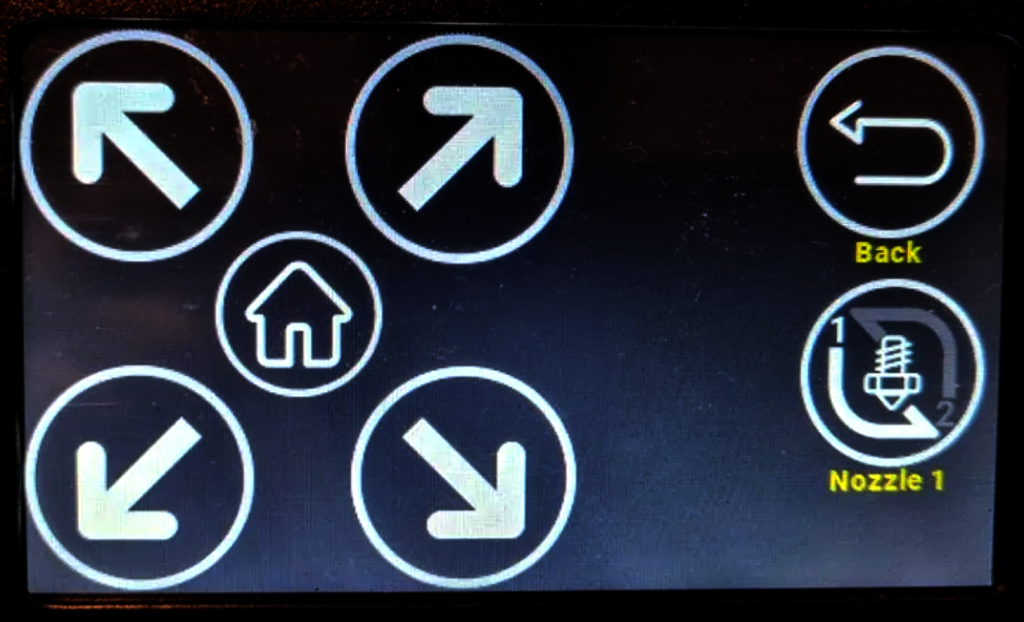
The Tenlog printers have a Leveling menu item and utility: use it. They call it semi-self-leveling, which is a lie. It’s just a method by which you can push a button and have the print head go to a corner and get to printing height that you may then use paper, below.
Try to follow the print head with the paper so that when the extruder lowers the paper’s already in place. This also helps prevent scratching your glass bed.
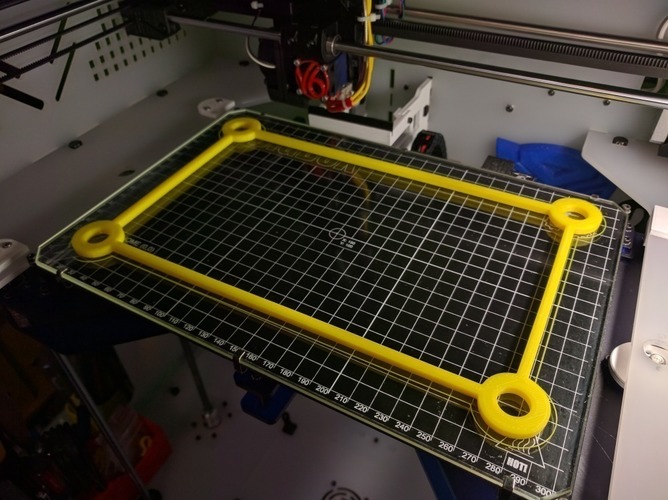
Step 6 – Print calibration squares or rings
Knowing that a) your extruder is at least a paper’s width off the glass and b) it’s not floating too far above the glass, you can now try to print something.
Step 7 – Adjust height according to “squish”
Now it’s all about the “squish”: while the test pattern is printing / in real time, you need to adjust the print bed knobs based on what you’re seeing. If round strips of plastic are coming out, increase squish by bringing the bed closer to the nozzle for that corner. If you’re seeing flat ribbons that are almost transparent with high walls on each side, back the bed off of the nozzle just a touch.
These are extremely fine adjustments – move the rotating knob under the bed a mere 10 degrees (out of 360) with each adjustment. Slow and steady wins the race.
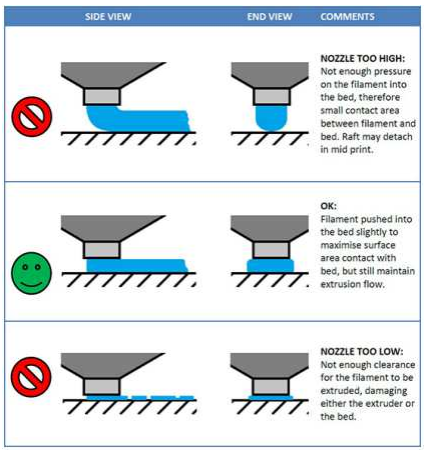
This image from a Reddit thread, one of very, very many. Getting the right “squish” is a big deal, this is the best image I could find regarding.
Please don't upvote. Trying to identify what first layer issue this is. from 3Dprinting
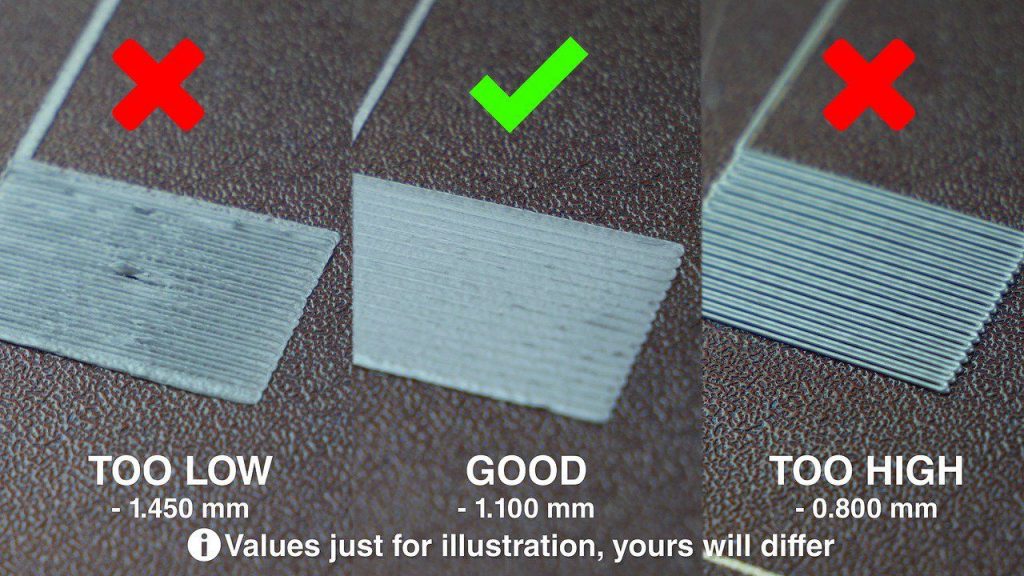
This image from Pinterest (I hate Pinterest!), so I can’t give credit where it’s due. If it’s yours, please let me (and Pinterest…) know.
If you have bizarre and inconsistent gaps and a very rough surface, it’s too low. if you just have ribbons of plastic, it’s too high. Look at the results under a magnifying glass: the more consistent and level the print results, the better is your “squish”.
Step 8 – Calibrate temperatures to assist with adhesion
Now that your squish is good, there may still be issues printing because your layers will lift off the print bed or still not stick, even though when it does stick you’re getting good “squish” – this can be because your temperature needs to be adjusted.
Assuming standard PLA, I’ve found the best adhesion to be with a printing temperature of 205 degrees and bed temperature of 60. This changes depending on your surface!
This is part of why I prefer a non-textured glass/mirror bed: a warmer bed helps the printed, “squished” molten plastic develop a solid vacuum seal on the perfectly smooth bed. Too cool a bed and it doesn’t seep into the micro-pores, but too hot causes an “elephants foot” on the bottom layer as it flattens out into the hot glass.
Different beds have different requirements. My previous textured glass bed liked 50 degrees because the plastic cooled faster into the little textured dots… but this was inconsistent.
Play with the extrusion temperature versus the heated bed temperature, and when it’s a super bitch to pull the print off without almost damaging the bed… you’ve got it!
Tips and Tricks
There are some things you can do to make this complex process just a bit easier, such as keeping consistent variables in the experiments: use the same filament for all tests (same spool if you can), and the same printed test models. After you get a successful print, change one parameter at a time.
Also:
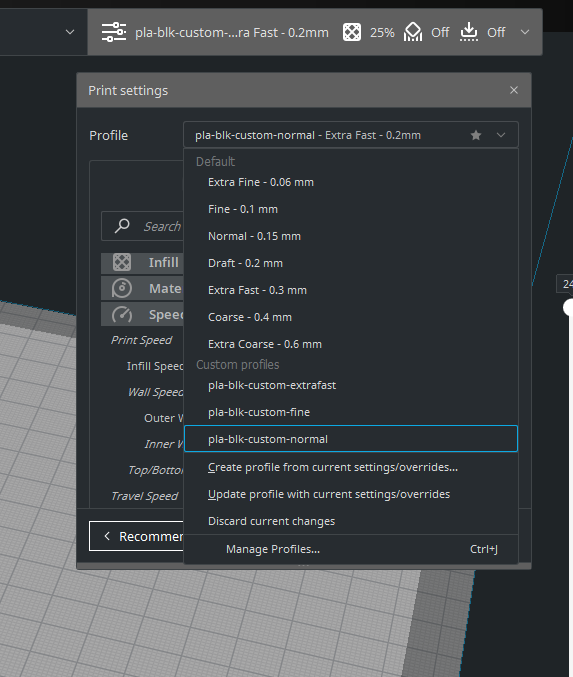
You can get a plugin for Cura (and I highly recommend Cura!) called Z Offset, which is fantastic. Rather then trust your own human hands to turn the knob just right when you get it close enough, this tool allows you to in/decrease height by 0.01mm at a time in software. Fidget with this once you’re close enough and you’ll have perfect “squish” all day long.
After squish, temperature, adhesion etcetera, the next thing to tune is speed of print, and this can take another few hours to get right. You need:
- prototype/Fast speed to allow you to “fail faster”
- Normal speed for general use, and
- Fine speed for when you really care about your output.
You need to figure out how fast you can print first and get a decent result, and then slow it down from there until it’s as pretty as you want it.
Note that different filament has different temperature and speed requirements, and that the two are related: if you print faster, heat up your filament a bit more so that it’ll lay down and melt into the other layers as expected. Keep that same temperature when you print slowly and you’ll have a pile of goop, so bring the temp down for “Fine”. Adjust about 5 degrees at a time, and there are many models on Thingiverse you can use to test for all this.
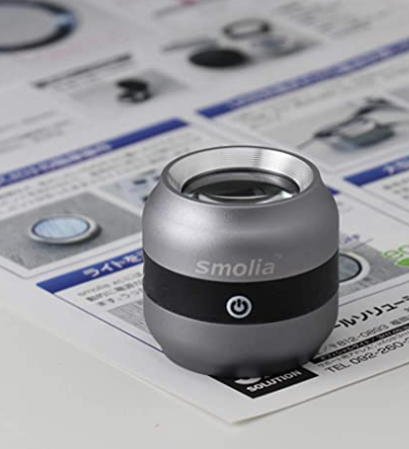
You need a magnifier! You can see layers and signs of a dirty extruder SO VERY MUCH better with one. If you can get your hands on a UV light (some models like the one pictured does have one), it’ll highlight debris and streaks on your glass bed like a neon sign, and you know you’re not done cleaning yet.
Conclusion
As you can see there are quite a few steps, and each one requires attention to detail and slow, careful, repeated changes until things start to come together.
The 3D printer is just a machine, it’s not impatient and it does what it’s told (any inconsistent parts need to be replaced, it’ll never print right in its life). Also, “try harder doesn’t work”: these things are designed to be ridiculously consistent, so if something doesn’t work the first time, don’t bother thinking you’ll get lucky if you try again. Just make a change and then try again until it works, and you’ll find it’ll keep working.
Please note I am in no way an expert: this is what I did with my machine and I post this information hoping that it might help you with yours, but you’re going to have to do very specific research for your printer and for the problem you’re having with it. These things take a great deal of time, but it sure is rewarding when you finally get what you need out of it!