This tutorial will assume you’re using NordVPN as your VPN provider. This is because their OpenVPN configuration files are standard and straight forward, plugging right into pfSense/OpenSense, making for an easier initial presentation. If you choose a different provider that’s okay, as long as they support OpenVPN.
When you sign up with any VPN service, they’ll provide to you software to get started. You can use this software on your smartphone or desktop (Mac, Windows PC, etc), but if you’re running Linux they probably won’t give you a program to use but a file to import. This pfSense/OpenSense setup requires those same files, ending in .ovpn .
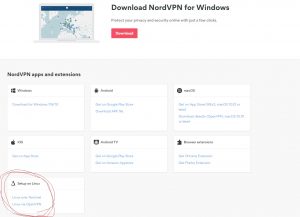
Go to their download section and look for Linux OpenVPN, pictured below:
The resulting page (at least for NordVPN) will be a helpful guide telling you how to get all this set up with Linux. Since you’re setting it up at the firewall level you’re looking for the link somewhere in the document going to “OpenVPN Configuration File Package”. This zip file is what contains all the .ovpn files you need.
This zip file contains all the .ovpn files you need. These files are for servers all over the world, they’re not inherently US centric; check out the filenames starting with US, UK etcetera.
You need to select four of these files. How do you know which four? You need to determine a) the geography (pick only the US files if you’re in the US) and b) the latency to the endpoint. Inside of each file is the endpoint IP address – ping this IP address, and the smaller the number the better.
A WAY easier way to determine this is to use the nordcheck.py Python script on this site, which will automatically download the .zip file, decompress it, ask you what geography to narrow the search down to and ping 8 servers at a time until it finds you the top three. Run it twice to get the top four.
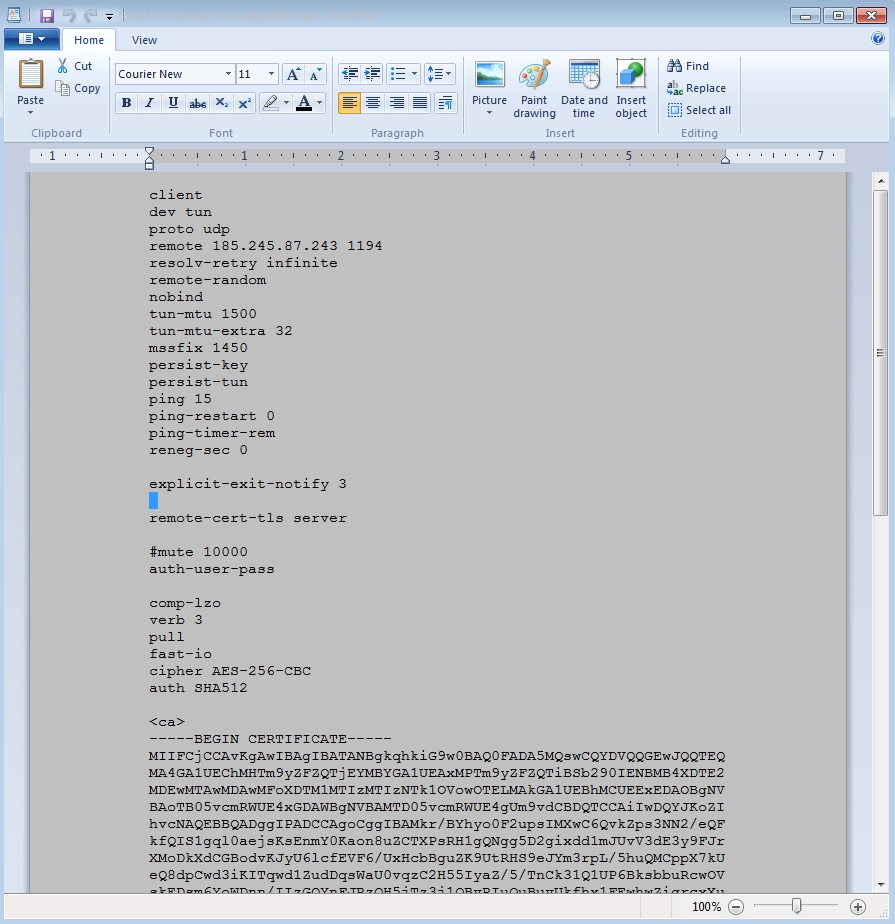
The .ovpn file is designed for Linux, so you’ll have to use Write if opening it in Windows for it to be more easily readable. Don’t save the file – just look at it – otherwise Write will add linefeeds and could mess up the file when it comes time to use it.
You’re going to clipboard all this content into a new pfSense/OpenSense OpenVPN client.
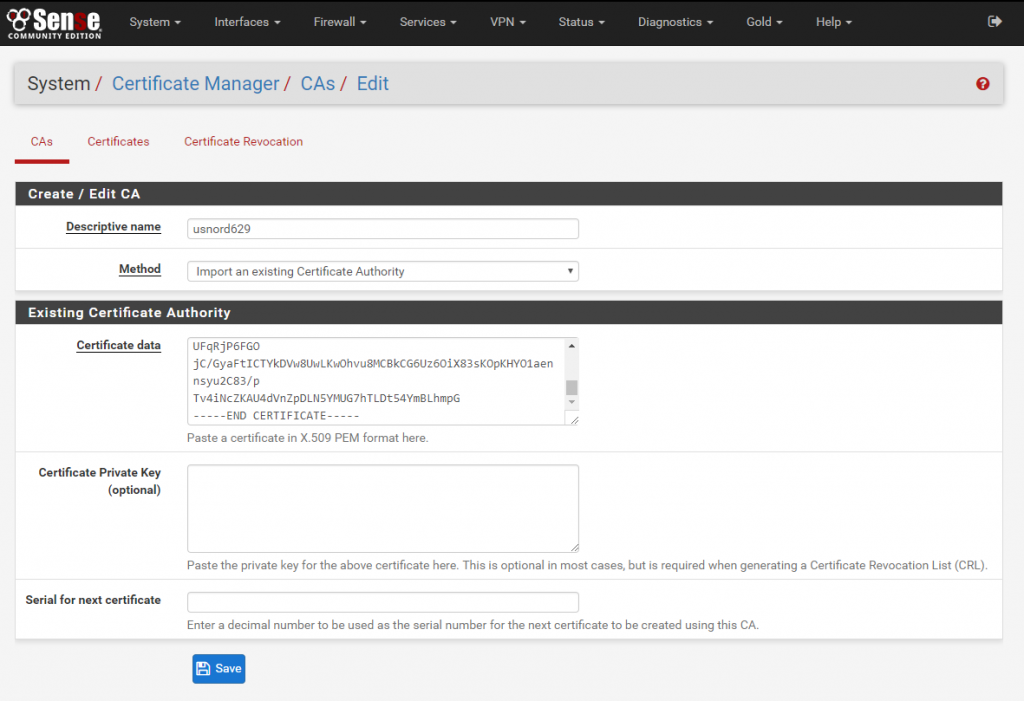
In pfSense/OpenSense, go to System -> Cert. Manager -> CA’s section.
Select Add
- Method : import an existing Certificate Authority
- Descriptive Name : I recommend the name of the file, like “usnord1592”
- Certificate Data : Clipboard the content between BEGIN and END CERTIFICATE, including the “——–” section markers at top and bottom.
- Private Key Data : Leave this blank.
- Serial for next certificate : blank.
Save. You’ll refer to this certificate later.
In pfSense/OpenSense, go to VPN -> OpenVPN -> Clients
Select Add

Quick note – UDP or TCP? Essentially UDP is faster and better for gaming, but not reliable and it’s easier for ISP’s to block. TCP looks like any other connection to GMail, Google or your bank, but it’s a little slower. Since we’re running traffic over four connections at the same time, I’ve found that latency matters less so I prefer TCP, the instructions for which are below. You could set up 2 as TCP and 2 as UDP if you prefer.
Here are the settings and mappings for the data you need to copy/paste into the OpenVPN client setup. Leave line items not mentioned here at default.
- Disabled : Ensure that’s not checked of course,
- Protocol : TCP on IPv4 Only (you can change this and the port number below to UDP if preferred)
- Device Mode : tun – Layer 3 Tunnel
- Interface : WAN
- Server Host or address : this is the remote line in the .ovpn, just put in the IP address, not the port at the end
- Server Port : here’s where you put the port, 443 for TCP or 1194 for UDP
- Description: I suggest something like usnord1595tcp (the name of the .ovpn file)
- Username: the username for the VPN service provider, your login name
- Password: the one you use to log into your VPN service provider account
- Authentication Retry : don’t bother, if it doesn’t work the first time it won’t work three tries later.
- TLS Configuration : use a TLS key (most providers provide a TLS key – if yours doesn’t, the “static key” section will be missing from your .ovpn file)
- TLS Key : Clipboard in the “OpenVPN static key” after section “tls-auth” towards the bottom.
- TLS Key Usage Mode: TLS Authentication
- Peer Certificate Authority: click and select the certificate you imported above. This is misleading – you don’t put the actual NordVPN CA here or anywhere since it’s authenticated point to point with a TLS key.
- Client Certificate : None – Username/Password Required. Some VPN providers do authenticate via certificate instead of username/password – import their client key as above (or via System -> Users, depending…) and then refer to that key here if needed.
- Encryption Algorythm : This changes, you’ll see it in the .ovpn file as “cipher” . This can change from endpoint to endpoint, check the .ovpn file for each one.
- Enable NCP : Newer versions of pfSense/OpenSense have this option which will allow the firewall and server to negotiate the best encryption algorithm. You can leave this disabled as you’re specifying the algorithm above.
- Auth Digest Algorythm : This can also change, check the .ovpn file for “auth”. If it just says SHA, that’s different than SHA1 – select specifically what the .ovpn file says.
- Hardware Crypto : if you have a modern chipset and network card pair you can enable this, but in 98% of circumstances it should be disabled.
- Compression : Adaptive LZO Compression. Confirm that your .ovpn file has a line “comp-lzo”.
- Custom Options : Here things can get tricky. Generally, it will look a lot like the code below, adapted from the .ovpn file. For Nord (and most others), this will be right:
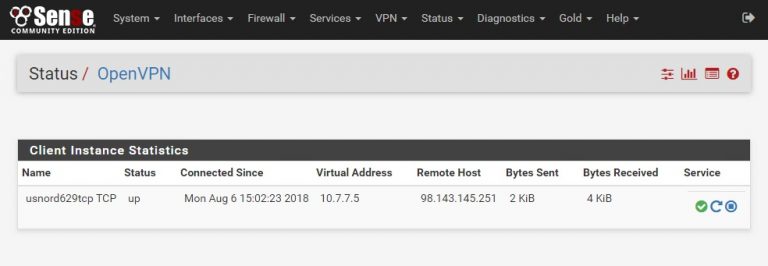
At this point, click Save and save this config. When you do pfSense will automatically try to connect – go to Status – OpenVPN and look at the Client Instances Statistics – you should see a new line item with “Status = up” and bytes sent and received. You won’t be able to proceed until this connection shows “up”.
Troubleshooting / Things to Check:
- First off, reboot the firewall. Sometimes when setting up OVPN tunnels or gateways it’ll get stuck on something – if you see the settings are right they probably really are, sometimes it takes a reboot to have them all take effect.
- Check your cipher/encryption algorithm, then your SHA1/256 hash values per the .ovpn file.
- After that, check out the logs : Status -> System Logs -> OpenVPN .


