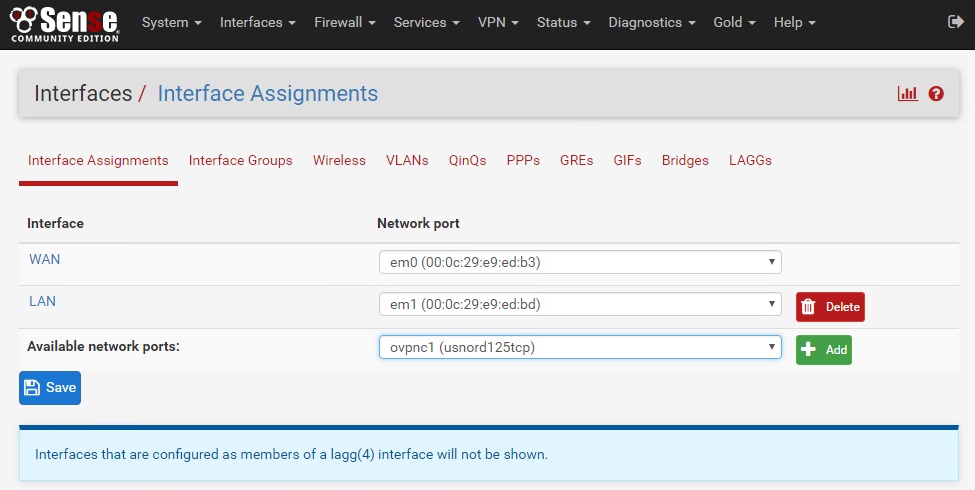
When your OpenVPN connections are up and good, they can be added as interfaces and start routing network traffic through them. At that point, go to Interfaces -> Interface Assignments.
In the Available Network Ports drop-down list you’ll see your newly added OVPN connections – add them one by one and edit their properties. By default, the system will call them OPTx (OPT1, OPT2, etc – not very descriptive).
Enable the interface (not enabled by default)
rename the interface to be the same as the OVPN connector, something like “intusnord125” to designate the interface from the OVPN connection.
Everything else can be left at default.
At this point you need to add aliases for your subnets. These are essentially tags that say “if the request is coming from a certain address range, route it like this..”.
There are three potential scenarios for routing:
No VPN at all. This is useful for work machines you bring home, work smartphones, playing network games with friends (reducing lag) or when your bank decides it won’t let you check your balance over a VPN.
“serial” VPN – go through VPN interface A, but if it’s down then try B and continue to fail through C and D until you find one that is optimal, or
“spread spectrum” VPN – always use multiple VPN connections simultaneously.
For these scenarios, you will only have two aliases and they’re used like this, in order:
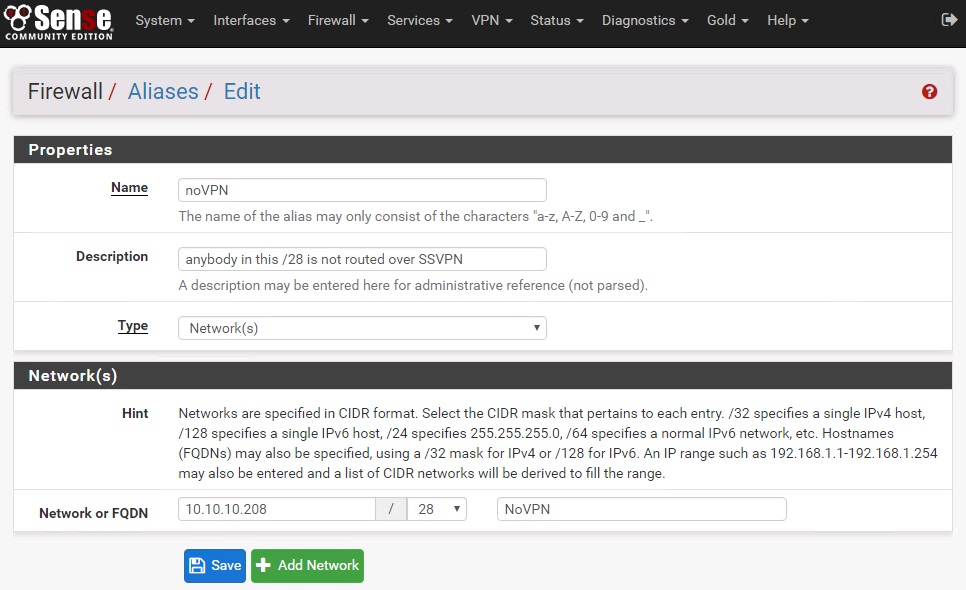
NoVPN : anything /28 (high IP address) isn’t routed over a VPN
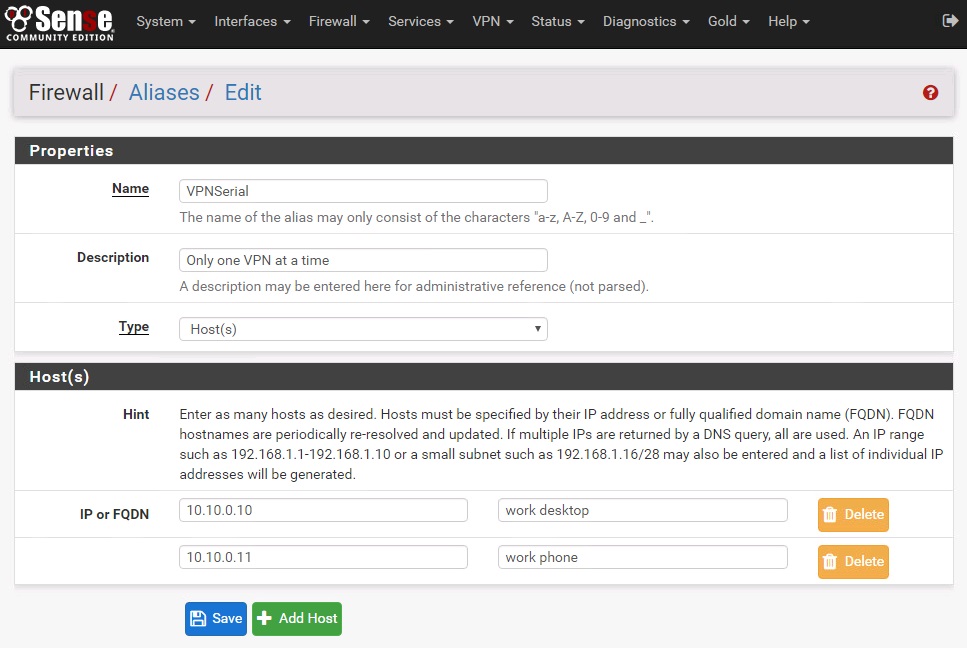
VPNSerial : any IP’s listed here will try one connection after the other, one at a time. Sometimes banks or other secure logins will complain when your IP address changes mid-connection (and this is reasonable).
NOT NoVPN: at this point if it’s not listed in the above VPNSerial alias and not in the NoVPN alias, then route all traffic across all VPN’s at the same time.
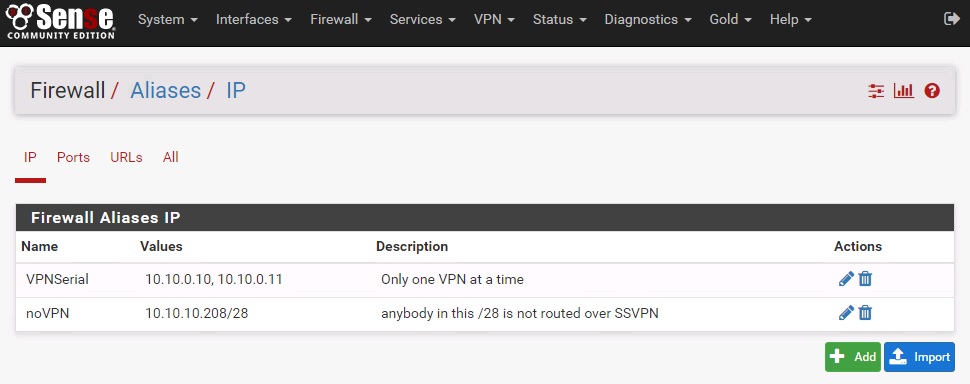
In the menu, select Firewall -> Aliases
Select Add to add the VPNSerial and noVPN aliases as shown below.
The picture at right shows the VPNSerial alias. This is a list of IP’s that you want to use VPNs for, but only one at a time.
This alias is the NoVPN alias – in this example, any machine with an IP address of 10.10.0.209 -> 10.10.0.253 will go straight out your primary WAN interfaces without using the VPN.
Now that we have aliases we can use, we can set up the outbound NAT. Network Address Translation is what allows your internal network to get routed out to the public Internet. When packets are sourced from the inside, the firewall translates the internal address outbound, and tracks the conversation. These steps configure the outbound NAT so your traffic is handled correctly.
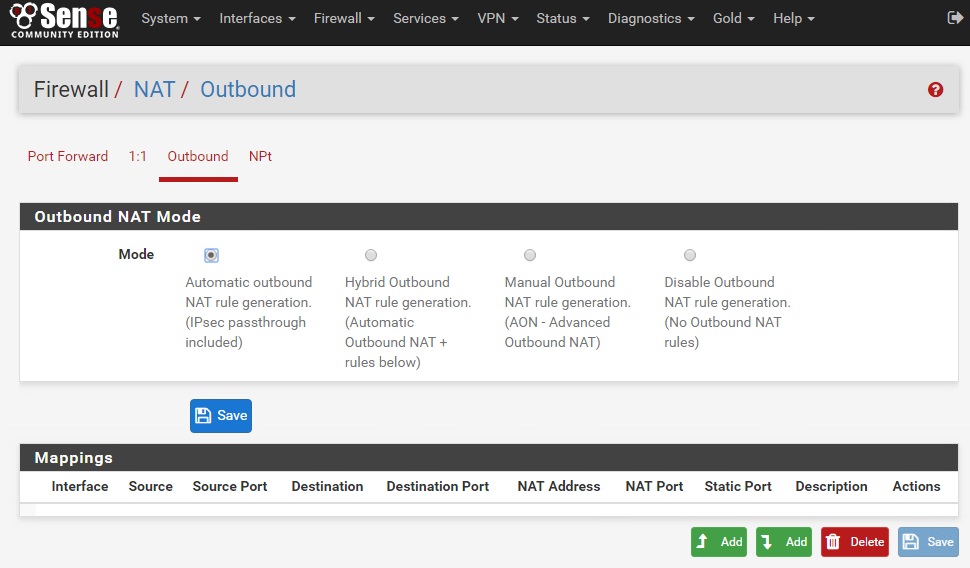
You see in the screenshot above the your NAT mode is “Automatic” – this will prevent you from setting different routes for different contexts so it needs to be changed to Manual Outbound NAT. Once this is set, all the automatically generated rules will be shown, you can add more and more specific routes. Click Save, then Add with the down arrow (ie, “add at bottom”).
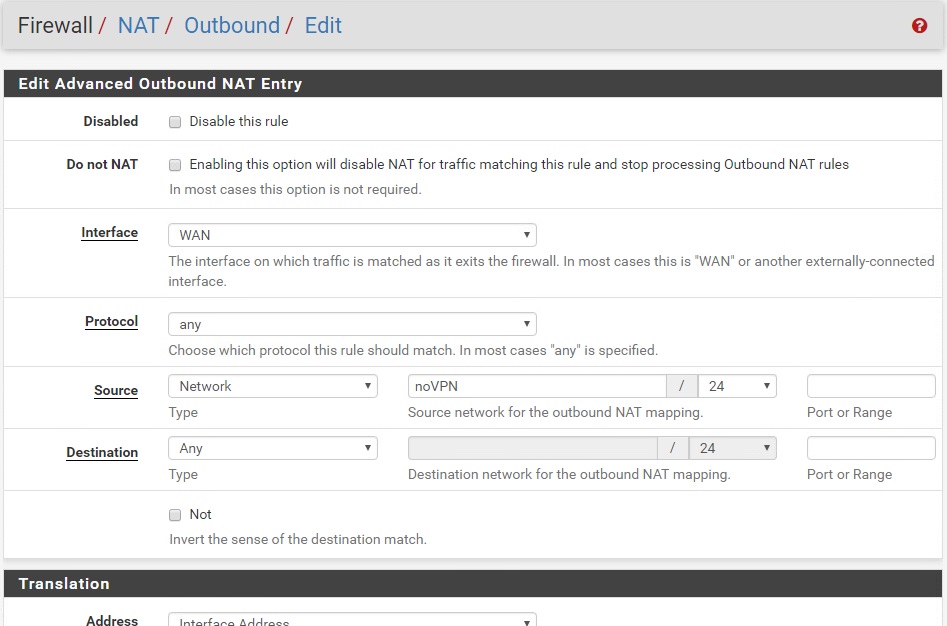
There are some important details in the screenshot at right:
Interface : Usually this refers to the source but in this context it refers to the destination. When creating this NoVPN route it’s going to read WAN – later it will have the VPN interface.
Protocol – leave this to the default ANY
Source – this is the network alias noVPN. That way, those IP’s in the NoVPN alias get routed to the WAN interface directly.
Leave the others at default and enter “NoVPN NAT” in the description. Save when done.
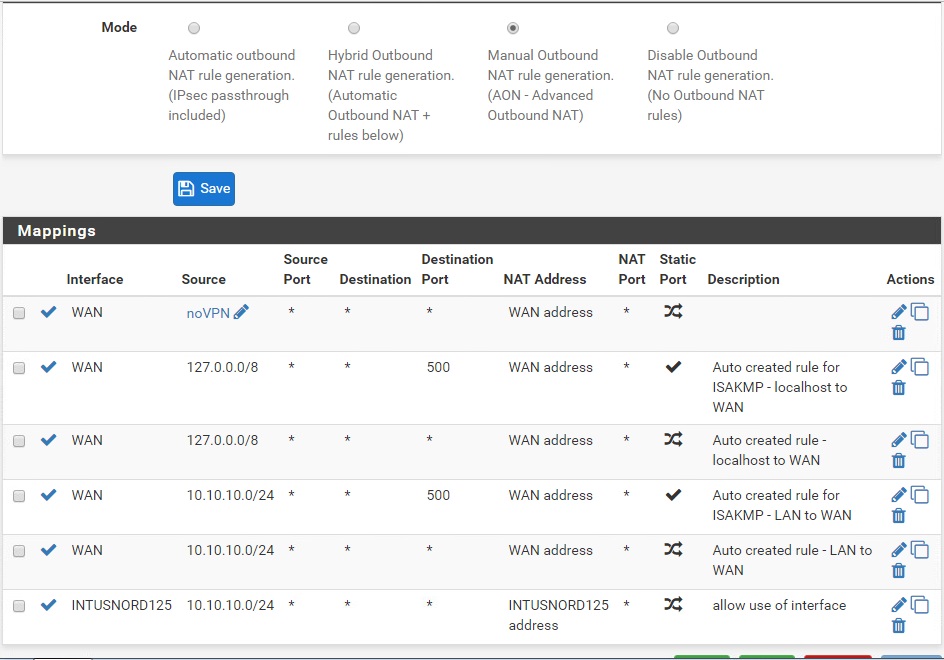
Add four more interfaces to NAT through – each of the four VPN interfaces. Similar to the screenshot above, you put in the VPN interface with a source of your local network (in this case, 10.10.10.0/24).
The screenshot above shows what things will start to look like as you finish these NATs (except you’ll have four interfaces where my screenshot above only shows one). You’re done when you have the NoVPN NAT, as well as one for each VPN interface you have.
Now we can move on to the next step : Routes and Rules.